This project will be building on the last one, “Animate Your Name.” If you haven’t done it yet, go ahead and do so now before starting this project. Or, skip that part of the project and add it in later. In this project, you will be creating a program about, you guessed it, yourself! Let’s get started.
Start off by opening your previous “Animate Your Name” project. If you haven’t made that project before, skip this step for now.
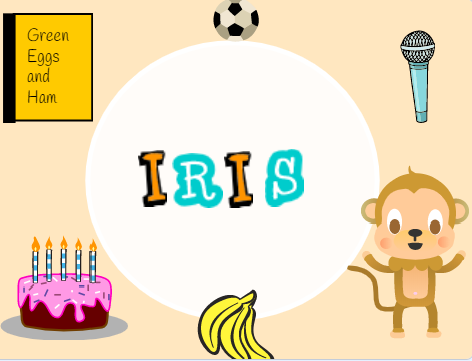
Pick a background for your project if you have not yet. Try to either pick or create a simple background so that it doesn’t distract people looking at your program from the sprites. Your background can be anything from a picture of your favorite place to a simple white circle like our example.
Next, pick out 6 sprites (characters). Add them to the existing letter sprites, so that the code you had earlier stays the same. You’re just adding in more details now. The first sprite you pick should be of your favorite food. In our example, Iris likes bananas. Next, pick your favorite animal and sport. Following that, pick your favorite instrument and hobby. Finally, pick a sprite to represent your favorite book. If the sprite you’re looking for doesn’t exist in the Scratch library, create your own!
Here is an example of how we did it. Since there were no books in the Scratch library, we made our own. Let’s see what you can come up with!
Example:
Once you’ve done all that, its time for the coding aspect of your project!
Start off with the sprite of your favorite book. Your goal is to code it so that when you click on it, it tells you about itself. You can also have it change its costume and return back to its original when you click on it, but that part is optional. In addition to this, you can also add sounds for specific sprites. For example, when you click on the monkey in our example, it squeaks. For example, Iris’s favorite activity is to bake, so we have a cake sprite. However, it changes into a doughnut when we click on it. We’re not going to tell you how to do it yet, so go ahead and try it out yourself!
Here’s a hint: check the looks section of the blocks to find a block that will make your sprite say a message.
After you’ve done this for one sprite, do the same for the rest!
If you get stuck, check out our project here: — https://scratch.mit.edu/projects/389948402 –> view our code by clicking the see inside button.
Each set of blocks has comments explaining how it works and what each block does. If you have more questions, feel free to leave a comment under the project, and we’ll get back to you as soon as we can.
Happy coding!
