In this post, you will be learning how to animate your name! If you want, you can also try this project with names of your friends, pets, or family. You can also access a similar tutorial in the tutorials page on the Scratch website, scratch.mit.edu.

There are a couple different ways you can go about animating your name. Lets start off with the basics!
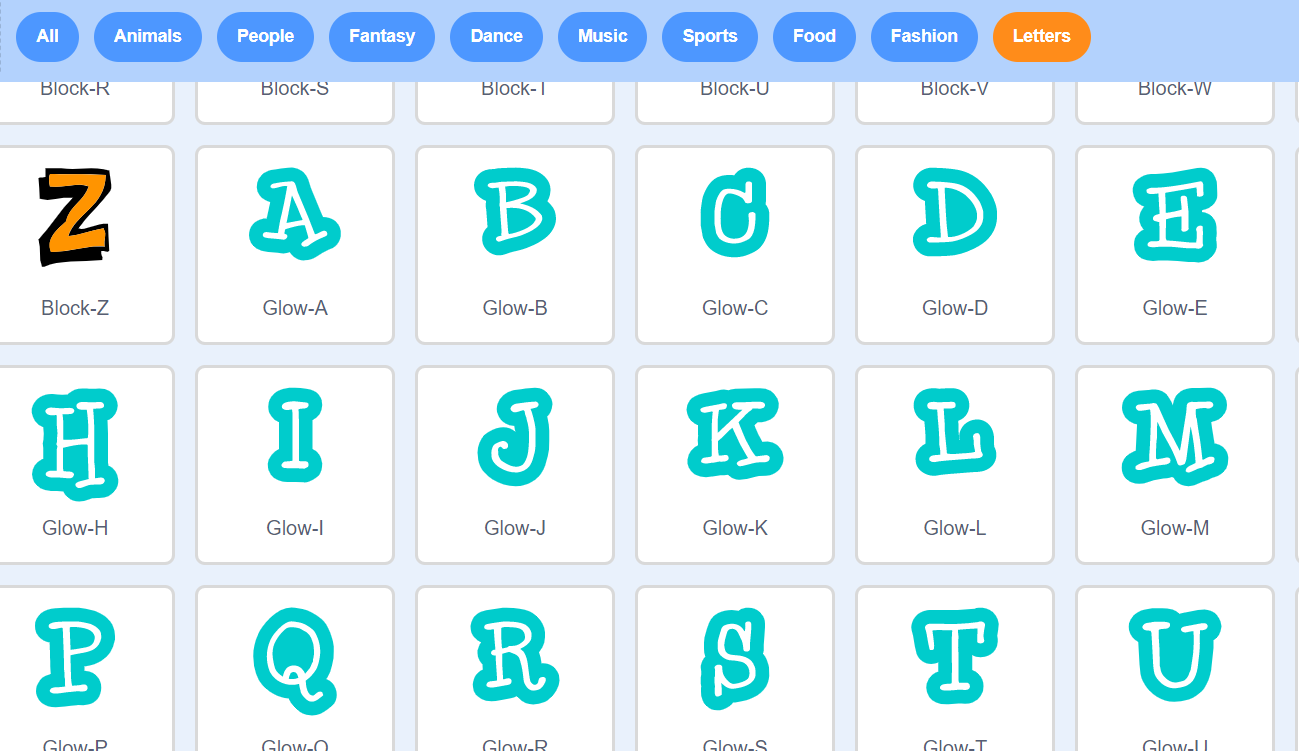
First, you need to pick a series of letters to form your name. You can find these letters in the sprite library, which is accessible by clicking the small sprite icon in the bottom right hand corner of your screen. Click on it and then pick the search icon, called Pick a Sprite. With this, you will be presented a screen that looks like this:
Once you’ve done this, add code so that each sprite plays a sound when it is clicked. To learn about sound and event blocks, check our our previous post for an introduction to blocks. Your code should look something like this:

Pick a sound that represents you. Then, do the same for all your other sprites (letters)! To select a different sound than what comes with your sprite, click on the sounds tab in the upper left hand corner, and then click choose a sound, which should be a small speaker-like icon. After you have done this, it’s time to play around with what each letter does! Here are a couple actions to get you started:
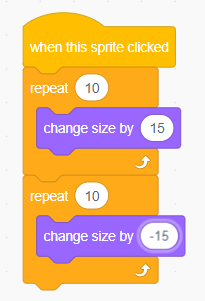
1. Change size: To do this, you’ll need to write a script so that when your sprite is clicked, it increases its size by a certain amount and then decreases size by the same amount. For example, if you grow the size by 15, it should decrease by 15 as well. To decrease the size, you will have to put a minus sign in front of your number, similar to how subtraction works. That way, it grows and then comes back to what you started with. Try it out on your own! If you need help, check out the following code for how we did it:
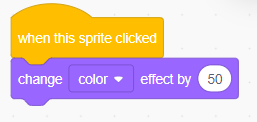
2. Change color: This one is pretty easy. Start by finding thechange color effect by (25) block. This block will change the color of your sprite. Check below to see how we wrote the code if you have any questions. Play around with the number 25 and record what you find. How does increasing or decreasing the number change the outcome?
3. Change costume: This might look different for each person, depending on what sprite you chose. First, get a when this sprite is clicked block. Next, go into the looks section and find the change costume to ” “ block. This will allow you to change the looks, or costume of your sprite. If you go into the tab labeled costumes, you will be able to see different appearances your sprite can have. You can create your own costumes there, and add them in. You can also remove costumes that you don’t like. One way you can animate your sprite is to have it switch to its next costume when you click on it. Go ahead and try it out! Or, play around with the blocks and figure out different ways to incorporate costumes into your script. Once again, these are all ideas, but always feel free to try something different and think outside the box! Here’s how we did it:

You can mix and match all these actions with your sprites, so that some of them do only one of them while others do one after the other. Play around with it! This is your name and your code, so feel free to add on more details! Remember: don’t stop trying until you’re proud of the program you have created.
Challenge: Here’s a challenge! See if you can figure out how to make one of your letters spin in a full circle when you click on it. Hint: check the motion blocks that talk about degrees.
Happy Coding!
