Post by YobeaxTexas Chapter Lead Rachit Kakkar:
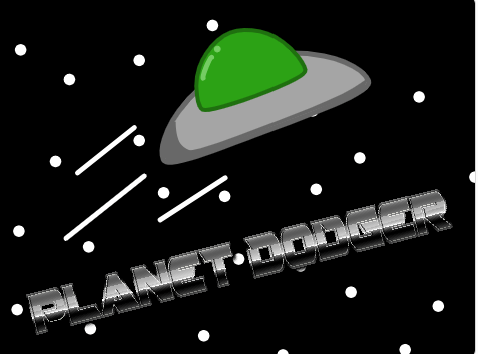
In the blog post, you will learn how to create an impressive “Planet Dodger” game in Scratch! The game features important advanced concepts that can be used to make all kinds of impressive games in Scratch, including smooth motion, a smooth scrolling background, animations, clones, and progressive difficulty (meaning the game gets harder as time goes on). This blog post is for more experienced Scratchers who understand variables, movement, and other intermediate concepts.
Part 0: Variables
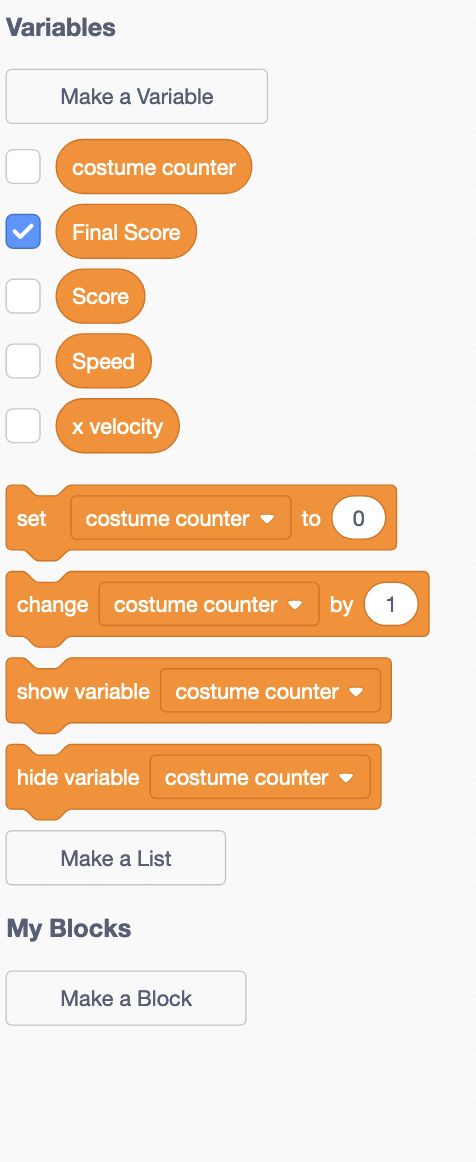
You will first need to create the following variables: Speed, Score, Final Score, x velocity, and costume counter. The term “x velocity” means the speed in the x-direction for the player. This is different from the “Speed” variable, which controls the speed (and thus difficulty) of the background and obstacles.
Part 1: Smooth Scrolling Background
The code here is based off this video which is made by the official Scratch YouTube channel and is a very helpful resource on making a scrolling background. I recommend you watch it if you are confused about any part of the scrolling background.
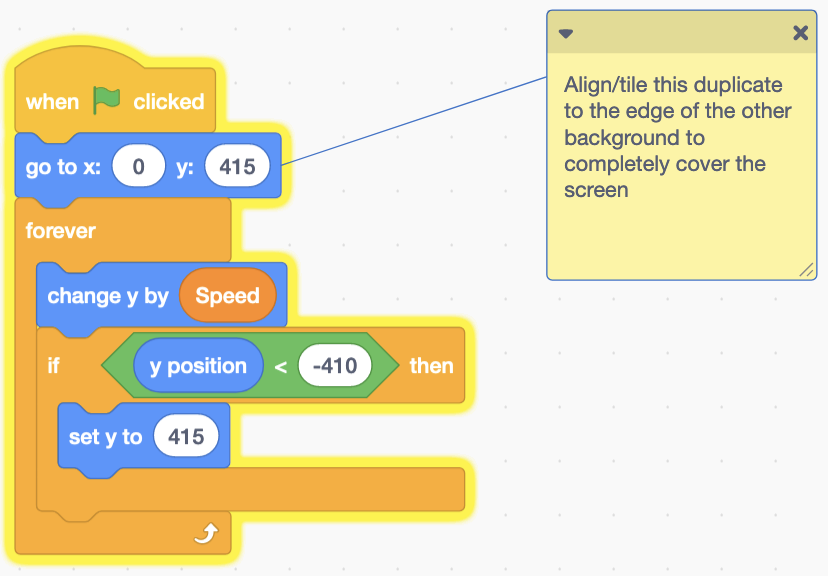
The smooth scrolling background is made up of two identical sprites that border each other along the up/down direction. The image of stars can be downloaded here [hyperlink download link]). The code will be identical for both except the starting position for one of the sprites will be different. Essentially, the background will need to go down until reaching the bottom of the screen (where the y-position is less than -410), where it will need to loop back over. Since there are two backgrounds, the entire screen is always covered. The speed at which the background sprites go down is controlled by the Speed variable.

Part 2: Player Animation
The player is simply the default Rocketship sprite provided by Scratch. However, this spite contains a costume without any flame which would look out of place when played with the other animations. Thus, we need some more complex code to control player animation beyond simply switching to the next costume in a loop.
The first step is to set the costume counter variable to 0 at the very beginning, as well as ensure the sprite is visible by using the show block and bringing it to the font. Afterward, we play a “lifting off” animation by switching to the costume without any flame and then switching to the first costume (with a flame) after waiting 0.5 seconds. Finally, in a forever loop we need some code to change the player to the next costume every 0.025 seconds (which creates the animation). Every time the costume is changed, we increase the costume counter variable by 1. Once this variable reaches four, we skip over the last costume (rocketship-e) that has no flame by setting the sprites costume right back to the first costume (rocketship-a). We also reset the costume counter variable back to 0.

Part 3: Player Motion
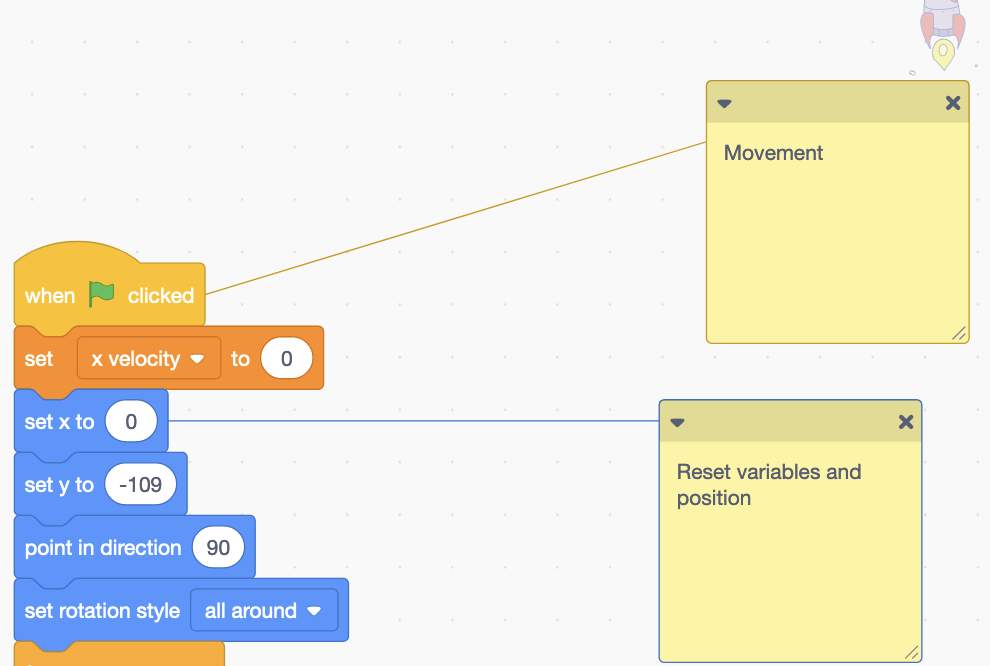
The player motion is handled by a separate block of code (also located in the player sprite). The first step is to reset the velocity, location, and direction of the player. We also need to change the rotation style to “all around”.
We then begin a forever loop that handles the actual motion. We want to cap the speed at a certain level, so we only handle movement if the x velocity is less than a certain value (20) in either direction (by taking the absolute value which makes the value positive). When the right key or left key is pressed, we want to move the player 10 steps in that direction initially. However, we also want to increase or decrease the x velocity variable, which will help create a “smooth” motion as the player will naturally speed up the longer a key is pressed. We also want to have the player tilt in the direction it’s moving, which is achieved with the point in direction block. This player is reset back to 90 degrees if no key is pressed.
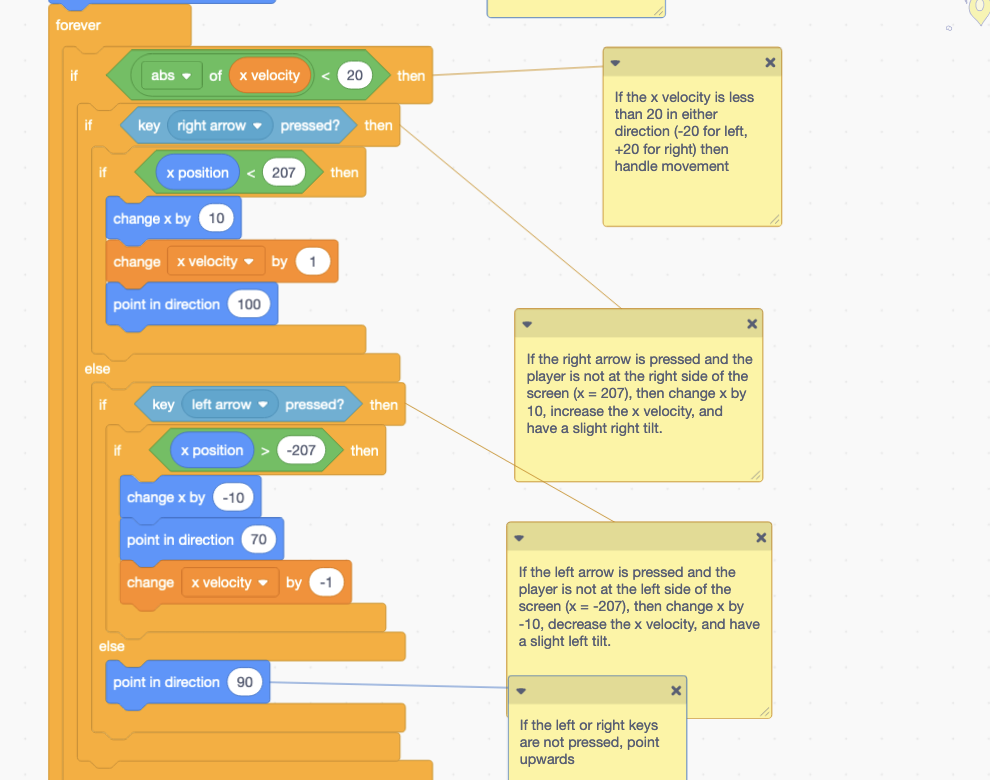
The final part of our for loop handles the actual movement of the player based on its velocity. If the player is not at the edge of the screen (where x is equal to positive or negative 207), then we change the x position by the x velocity variable. This variable increases the longer the right or left keys are held down, which in turn speeds up the player. We also reduce the x velocity variable by 10% at the beginning (by multiplying by .9) in order to slowly bring the player to a stop if no key is pressed. If the player is at the edge of the screen, we simply reverse its direction by multiplying the x velocity by -1 as well. This creates a “bounce” effect.

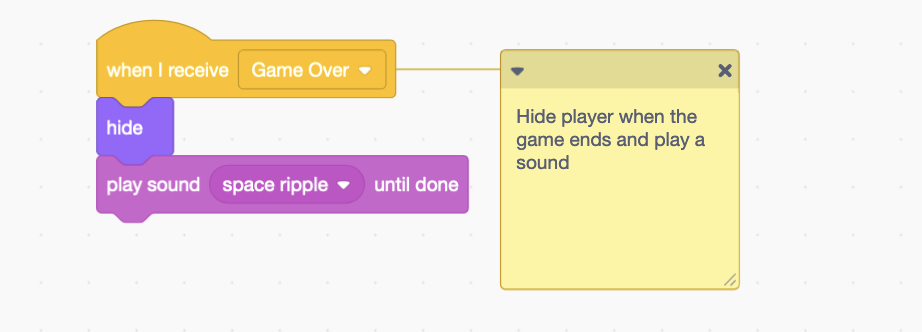
Part 4: Game Over for Player
The final part of our player code runs when the player receives the “Game Over” broadcast, and it simply hides the player and plays a sound.
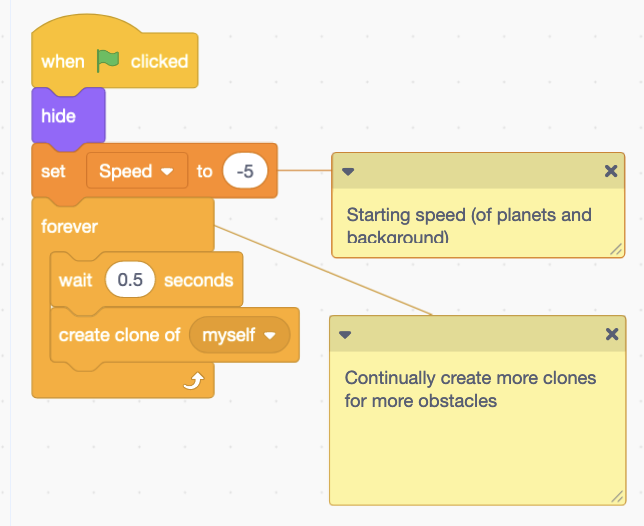
Part 5: Obstacles
The obstacle sprite is just the default Planet sprite from Scratch. It consists of two parts. The first part just hides the main sprite, sets the starting Speed to -5, and creates a new clone every half second.
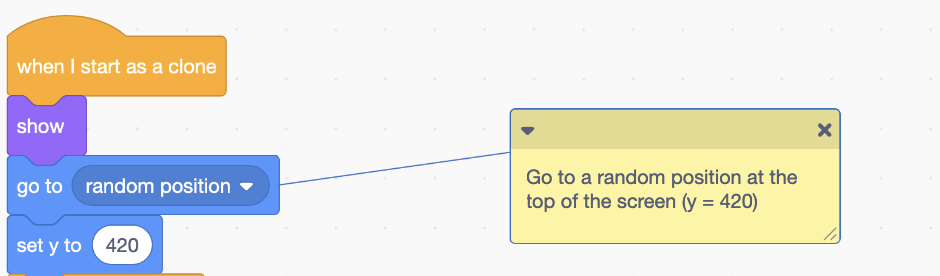
The second part handles the behavior of the clone. When a clone is created, it will show itself and move to a random x-position (which is achieved by moving to a random position and then setting the y-position to the top of the screen at 420).
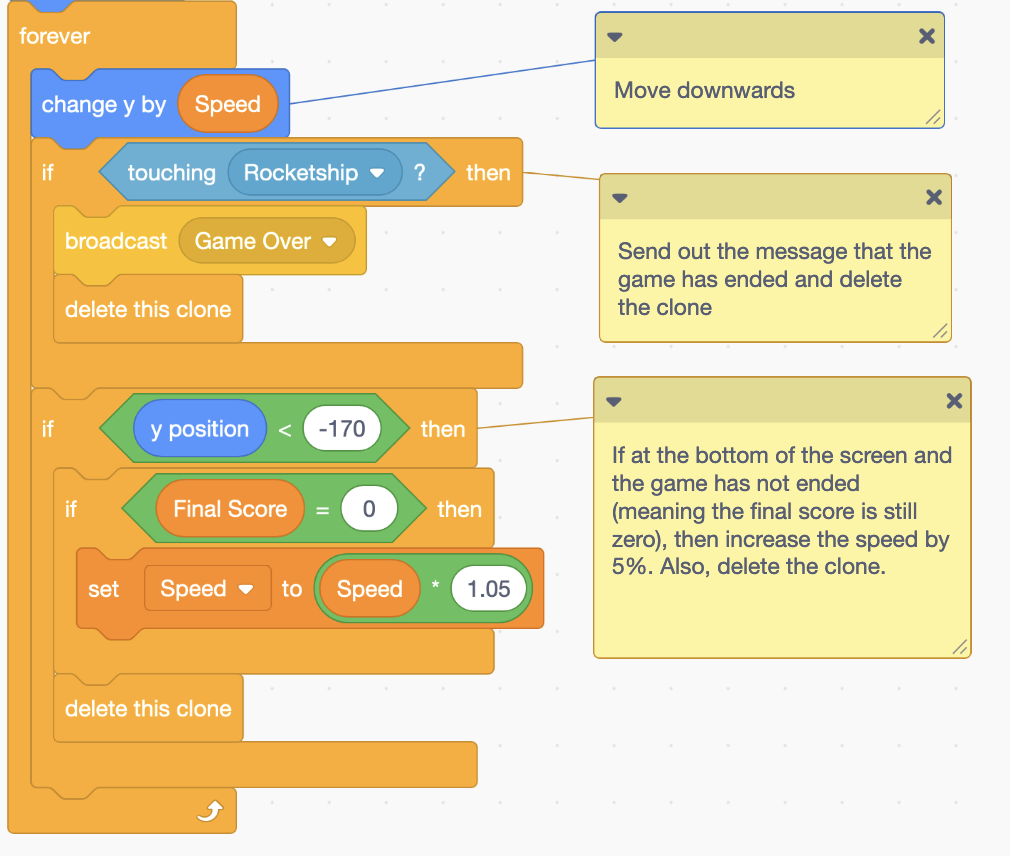
Then we enter a forever loop where the obstacle moves downwards at a speed dictated by Speed. If it touches the Rocketship/player, it broadcasts the “Game Over” message and deletes itself. Otherwise, it just deletes itself when it reaches the bottom of the screen (y < -170) and increases the speed by 5% (as long as the game has not ended, which is determined by checking if the Final Score is still 0). This increase in speed makes the game harder as obstacles move faster.
Part 6: The Score
The score handler sprite can be anything as it will be hidden anyway.
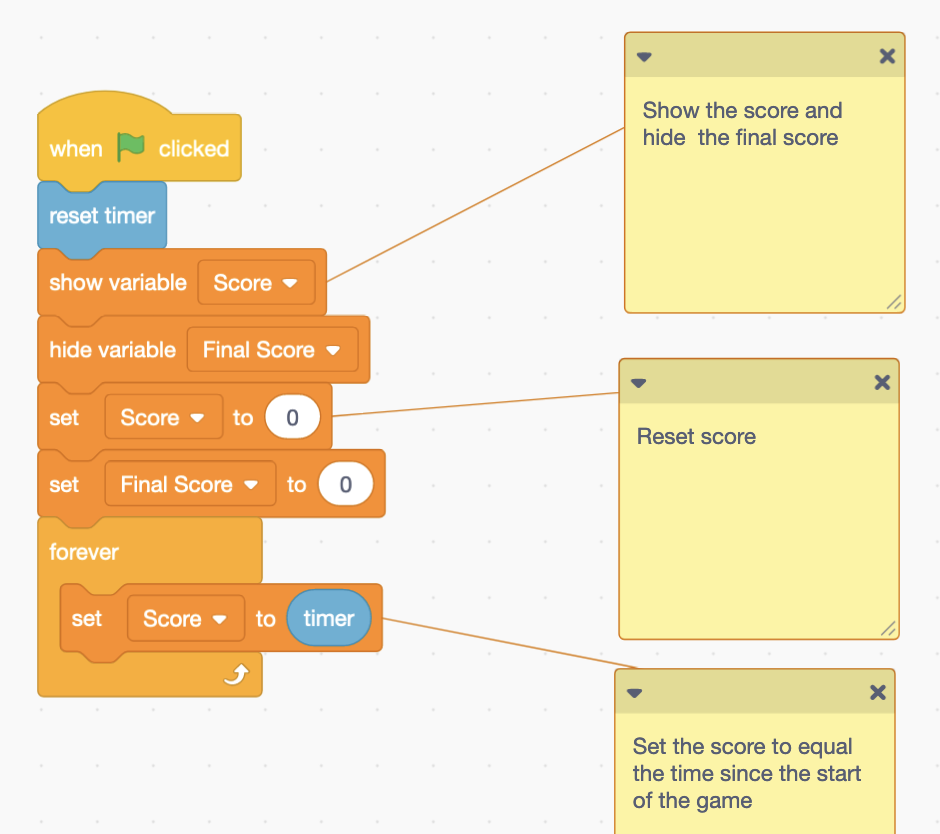
It also is made up of two parts. The first part resets everything score related (timer, Score, Final Score). It also shows the Score variable so the player can see it and hides the Final Score (as the game has not ended. Then, it forever sets the Score to the time the player has survived for.
The next part happens when it receives the “Game Over” broadcast. The Final Score is set to the current Score variable and shown to the player, while the current Score is hidden.

Part 7: Game Over Text
The Game Over sprite is just some large purple text in the “Pixel” font.
It has very simple code, hiding itself when the game starts and showing itself when it receives the “Game Over” message.

Conclusion
With that, the game is finished! Hopefully, this project taught you about advanced Scratch topics and gave you something impressive to show friends and families. The techniques in this project (smooth motion, a smooth scrolling background, animations, clones, and progressive difficulty) are used in all kinds of impressive Scratch games, and now you know how to use them!
